Showing posts with label Instructions. Show all posts

Saturday, March 3, 2012

Whoopie!!

When I was young...(oh, who am I kidding...even now) Whoopie Pies were my gold standard when it came to Gramma's yearly baking list. Every holiday season, she'd pull a container of these from the freezer and send me on my merry way -- this past season was no exception! I loved these simple little cakey sandwiches, especially when they were partially frozen, and decided it was high time I tried to make them myself.

This is not Gramma's recipe, but the final result is pretty darned close. While researching these treats, I discovered that they seem to have origins in Maine and in Dutch heritage having once been a solution to extra batter and frosting left over when the cake baking was done. Either way, they are good and I hope you enjoy my little slice of childhood goodness.

So first things first, and we get our ingredients together:


To make your life easier later on, start by sifting all the dry ingredients into a bowl.


Cream together the shortening and sugar. 


Once it's kinda fluffy, throw in the beaten egg yolks.


Using the alternating method, add the dry ingredients and milk/vanilla in three parts, beginning and ending with the dry ingredients. 


The mixture is very, very thick when you're finished. I suspect with just a little more flour, it could be a chocolately dough! But that wouldn't get us the wonderful Whoopie Pies, would it? :)


Using a small ice cream scoop or two teaspoons, drop the dough onto a parchment lined cookie sheet and bake!


 (n.b. My small cookie scoop broke, so I used my regular ice cream scoop. This is why my final product is HUGE. I can't say don't do it, but it you want more than 8 final sandwiches, make them smaller than I did!)

It was right around this time that I realized I had enough batter to make 4 more cookies, so I went searching for my other cookie sheet. 3 cupboards and I then remembered where it was.


So I used a pizza pan instead!

The final product smelled and looked so good!

So while these were cooling on the racks -- you can take them immediately from the cookie sheet to the rack once they're out of the oven -- I got together my filling ingredients:


All of this went into the mixer bowl and made a beautifully delicious filling!


I spread (ok, I piped) the flat side of half the cookies with the filling and sandwiched them together for a really awesome treat!


The rest, of course went straight to the freezer. 


Happy Baking!!

Crystal 

-----------------------------------------------------------------

Whoopie Pies

For the cake:
5 tablespoons of cocoa
2 cups of flour
1 tsp baking soda
1 tsp baking powder
1 tsp salt
1/2 cup of Crisco shortening
1 cup of sugar
1 cup of milk
1 tsp vanilla extract

Preheat the oven to 375F. Line a large cookie sheet or jelly roll pan with parchment paper.

1. Sift together the dry ingredients in a bowl and set aside. In a mixer bowl, cream together the shortening and sugar. 
2. In alternating additions, beginning and ending with the dry mixture, add the milk & vanilla and dry ingredients to the shortening and sugar. 
3. Using either a small cookie scoop or two teaspoons, drop the batter in equal amounts 1 inch apart on the parchment-lined pan. 
4. Bake for 7-10 minutes (13 if you use a full sized scoop) or until the cookies are set. 
5. Remove the cookies to a wire rack (flat side down) to cool. 

For the Filling: 
1/2 cup of Crisco shortening
2 cups of confectioners (icing) sugar
2 egg whites (since these are not being cooked, I used pasteurized egg whites from a carton, but it's up to you!)
A dash of salt
2 tablespoons of marshmallow creme or fluff

Combine all the ingredients in a mixer bowl and beat until smooth. 

Spread the filling mixture on the flat side of half of the cookies and sandwich together. Store in a container with a tight lid or in the fridge/freezer. 

Enjoy!


Saturday, January 28, 2012

A Love Story...

My husband loves...very few things openly: me, our dog, firearms, computers and German chocolate cake. The last of these is a bond so strong that when I offered to make him a really kickass, gun-inspired cake for his recent 30th birthday, he responded by saying that he'd really rather have the German chocolate cake that they make at the grocery store.

Low, man, really low.

And so, I begrudgingly complied with his request (after all, it was his birthday) and as I sat there poking around at the light brown, coconut and pecan filling, I couldn't help but wonder what all the hype was about. DH doesn't seem to be able to pinpoint the exact cause of his obsession, but since the day we met, I've known that, when in doubt, this is the cake to roll with as far as he's concerned. He also has a habit of mentioning that he only gets it once a year, for his birthday (totally not true!) so I'm putting my coconuts on the table and making him the biggest and best post-birthday German chocolate cake ever!

I've missed typing this: First, we start with some ingredients!


First, grease and flour your pans. For this cake, you've got options. It'll make +/- 8 cups of batter. You could use 3 9-inch pans if you've got them. In my case, I went with a 10-inch round pan (yes, my cake is HUGE. I had no complaints!)

Next, prep your first two mixes:

First is the chocolate. I know this is called a German chocolate cake, but when you live in a small town with limited access to finer baking goods, you sort of have to go with what works. I took the sweetest chocolate chips I could get (milk) and it worked out fine. Along with 1/2 cups of water, melt 4 oz of chocolate in a small bowl.


It won't take long if you do it in the microwave -- around 20 seconds will do the trick! Stir until everything is smooth and set it aside to cool.

Second is the cake flour, baking soda and salt. Sift these together and set them aside.


Now it's onto the fun part!

In your mixer bowl, cream together the sugar and butter until everything is light and fluffy.


Beat in 4 egg yolks, one at a time until everything is well-incorporated, then add the chocolate/water mixture and vanilla.


Once that's all mixed, start mixing the flour mixture and buttermilk in, adding each in thirds and mixing until everything is just mixed.


In a metal (or glass) bowl, beat the egg whites until stiff peaks form.

Yep, that's my reflection in the top of the bowl!!
Fold a third of the egg whites into your cake batter. Then mix in the rest, being careful not to overdo it!


Put your pan(s) into the oven and bake! If you're going with the 3 9-inch pans, 30 minutes or so will be perfect. As I mentioned, I used a 10x3 round pan and it took well over an hour to bake. The toothpick never lies, however, so when it comes out clean, your cake is done!

The filling comes next. 

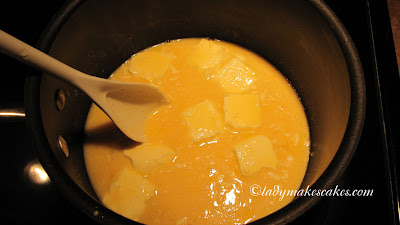
In a medium sauce pan, add the sugar, evaporated milk, butter and egg yolks (save the extra whites for a yummy omelette tomorrow morning!)


Cook over low heat, stirring constantly (I mean it!) until the mixture starts to get thick. 


I generally judge it by how long I can see the bottom of the pan between passes with the spoon. Once the mixture starts to hold for a second before covering the spot, it's right on. Remove the pot from the heat and add the coconut, pecans and vanilla. 


Stir well and set it aside to cool. 

Once the cake and filling are cooled (the filling will thicken up, don't worry!) spread the filling in between the cake layers (I cut my 10 inch cake in half and filled it) 


Now, traditionally, these cakes don't get frosted. Instead, you'd mix 4 oz of semi-sweet chocolate with 2 tsp of shortening and drizzle it over the cake. However, Mr. LMC whined that he wanted a frosted cake, and a frosted cake he got! I hope he's hungry!!


Happy Baking!! 

Crystal 

------------------------------------------------------------------------------


German Chocolate Cake

Ingredients

(Cake)
½ cup of water
4 oz of German (or milk) chocolate
1 cup of butter, softened
2 cups of sugar
4 egg yolks
1 tsp vanilla extract
1 cup of buttermilk
2 ½ cups of cake flour
1 tsp baking soda
½ tsp salt
4 egg whites

(Filling) 
1 cup sugar
1 cup evaporated milk
½ cup butter
3 egg yolks (beaten)
1 ½ cups flaked coconut
1 cup of pecans (chopped)
1 tsp vanilla extract

(Glaze)
2 tsp shortening
4 oz chocolate

1. Preheat the oven to 350 F (325 F if you’re using a 10x3 pan) Grease and flour 3 9-inch cake pans.

2. In a small bowl, heat the water and chocolate until the chocolate is melted. Stir until smooth and set aside to cool

3. In a bowl, sift together the flour, baking soda and salt.

4. In your mixer bowl, cream the butter and sugar until light and fluffy. Beat in the egg yolks, one at a time until everything is well incorporated. Blend in the chocolate mixture from step 2 and add the vanilla extract.

5. Alternating in thirds, beat in the flour mixture and buttermilk until everything is just mixed -- do not over mix!

6. In a large metal or glass bowl, beat the egg whites until stiff peaks form. Fold a third of this mixture into your cake batter, then fold in the rest -- again, don’t over mix!

7. Bake for approximately 30 minutes, or until a toothpick inserted in the centre of the cake comes out clean!

8. For the filling, combine the sugar, evaporated milk, butter and egg yolks. Cook over low heat, stirring constantly until the mixture has thickened. Remove from heat and stir in the vanilla extract, coconut and pecans. Set aside and let the mixture cool and thicken.

9. Spread the filling between the cake layers and on top of the cake.

10. Melt the shortening and chocolate in a small bowl, stirring until smooth. Drizzle over the top of the cake and enjoy!


Tuesday, October 18, 2011

The Perfect Frosting

We've all heard of... the "I'm Not a Frosting" person...they lurk in the offices, at the parties, or stop by the bake sale table. And I really can't say that I blame them, having had my share of super-sweet frosting with a strong confectioner's sugar overtone which is enough to make one scrape the excess off with a knife.

This frosting, however, is different.

Firstly, there isn't a trace of confectioner's sugar in the mix. Crazy, right? One cup of good ole granulated sugar completes this sweet topping.There's also flour, which is plenty common in the cake, but rarely seen in the frosting. Now that I've got your mouth watering, let's get on with the recipe!

As always, we begin with the ingredients:


The first step should be done well in advance as it will require some cooling time.

The flour and milk go into a small saucepan:


Get this all whisked together and put it over medium heat.


Whisk continuously and be sure to NOT walk away from this mixture, not even for a few seconds. It will thicken incredibly fast once it starts and even just a few seconds could make or break it. The end consistency should be around the texture of pudding.


Once it reaches pudding stage, remove it from heat and continue whisking it until it's all smooth.

Put this mixture aside until it's completely cooled. You can even transfer it to a dish and put it in the fridge. Even if it's cold, it's fine. Just as long as there's no trace of "hot" left!

Once you're ready to continue, get your butter and sugar into the mixer bowl and add the whisk attachment.


Mix for a few minutes until everything is fluffy.


Add the vanilla and the cooled flour/milk mixture.


Now, here's the critical part: put the mixer as high as you can without anything going flying out of the bowl. It will take nearly 8-9 minutes of high speed mixing before the frosting starts to look like frosting. Around the halfway point, you'll stop the mixer to scrape down the sides and wonder just what the crazy cake lady has gotten you into, when you see the slightly separated mixture. Don't fret. Keep Mixing!

At 5 minutes:
 At 10 minutes: (I added orange colouring since I'm going to use this on Halloween cupcakes tomorrow night!)


The final result for your time and patience is a wonderfully smooth and silky, light and sweet frosting. It is the perfect texture for piping a 1M swirl or icing that layered cake.

If you make it the night before (like I did) you'll want to seal it in an airtight container and keep it at room temperature. In the fridge, it tends to separate. But it keeps nicely in a container on the counter until you're ready to use it!!

Enjoy! :)

------------------------------------------------------

The Perfect Frosting

6 tablespoons of flour
1 cup of whole milk (1% or 2% work fine too :)
1 cup of butter at room temperature
1 cup of granulated sugar
2 tsp of vanilla (or your choice) extract

Whisk together the flour and milk in a small saucepan over medium heat. Whisk continuously until the mixture starts to thicken. It will thicken very quickly once it starts, so when it begins to look like pudding, remove it from the heat and whisk until it's smooth. Set it aside to cool completely. If it's not completely cooled, it will melt the butter in your final mixture and you'll end up with a runny final product.

Once the mixture is cooled, whisk together the butter and sugar in the mixer until it's fluffy. Then add the cooled flour and milk mixture and extract. Whisk at the highest speed you're comfortable with (around a 6-8 on my Kitchenaid mixer) for 8-10 minutes, scraping the bowl occasionally, until the mixture becomes light and fluffy.

This will make enough for a whole 8 inch cake or 24 cupcakes!

Sunday, September 11, 2011

Go "Dough"nuts!

As most of my followers know... (and thanks to the handy little intro to the left) I am a police wife. This being said, I've heard my share of doughnut jokes. I was originally planning to make the department some chocolate cupcakes this weekend, but when I stumbled across a homemade doughnut recipe on All Recipes.com, I figured it was about time I caved to the stereotype. And so tonight, I am sending Mr. LMC off to work with a tray full of homemade, insert-joke-here goodness.

As I began this rather early this morning, and because nothing goes better with a fresh doughnut, step one today includes the making of coffee:


The ingredients are simple enough:


The first step is to get the yeast working for the greater good. Sprinkle it over the warm water and watch the magic happen!


Next, we throw in the rest of the ingredients, saving 3 cups of the flour for gradual adding lately. Use the dough hook attachment on your mixer to save your arm a lot of work!


Once the initial ingredients are well-combined, add the remaining flour in 1/2 cups until everything is mixed and the dough starts to pull away from the bowl. 


Once the dough is done mixing, knead it in the bowl for another 5 minutes or so, or until the dough is elastic and smooth.


Put the dough into a greased bowl, cover it with a tea towel and let it rise in a warm place until it's doubled in size. You'll know it's ready when you poke it and the indentation remains!

Next, turn the dough out onto a floured surface and roll it until it's about 1/2 inch thick.


Using a floured doughnut cutter, cut out as many doughnuts as you can. You can save the middles and remaining dough to make some doughnut holes later! :)


Leave the cut out dough pieces in a warm place, covered lightly with a tea towel until they've doubled again.

Once the dough is ready, it's time to fry them up! Using either a deep fryer or heavy saucepan, heat up your oil to about 350 degrees. As the LMC household doesn't own a deep fryer and Mrs. LMC isn't crazy about deep frying in general, I opted to use my wok, all the while keeping a very close eye on it!

Please, please, please be careful when frying without a deep fryer. Keep your eye on the oil at all times!!


A good trick to test your oil is to use some of the excess dough as a test to make sure it's ready to fry!

Very carefully slide a few doughnuts at a time into the hot oil. Once they rise to the top, flip them over and fry until the underside is browned and cooked through.


Remove the cooked doughnuts to a wire rack and let them cool. The best system is to put a wire rack over a cookie sheet lined with parchment paper.


Don't they look good? :)

Next it's time to ice these yummy creations up! I used my previous tip on melting creamy frosting in the microwave until it was dippable. Then, of course, I added sprinkles. The print link will take you to the original recipe which gives a great, sweet glaze that you can make if frosting is not your thing :)


Let the frosting set and voila! I highly suggest bringing a batch of these to your local police department :)


Enjoy!!

Crystal