Showing posts with label On Cake. Show all posts

Saturday, March 3, 2012

Whoopie!!

When I was young...(oh, who am I kidding...even now) Whoopie Pies were my gold standard when it came to Gramma's yearly baking list. Every holiday season, she'd pull a container of these from the freezer and send me on my merry way -- this past season was no exception! I loved these simple little cakey sandwiches, especially when they were partially frozen, and decided it was high time I tried to make them myself.

This is not Gramma's recipe, but the final result is pretty darned close. While researching these treats, I discovered that they seem to have origins in Maine and in Dutch heritage having once been a solution to extra batter and frosting left over when the cake baking was done. Either way, they are good and I hope you enjoy my little slice of childhood goodness.

So first things first, and we get our ingredients together:


To make your life easier later on, start by sifting all the dry ingredients into a bowl.


Cream together the shortening and sugar. 


Once it's kinda fluffy, throw in the beaten egg yolks.


Using the alternating method, add the dry ingredients and milk/vanilla in three parts, beginning and ending with the dry ingredients. 


The mixture is very, very thick when you're finished. I suspect with just a little more flour, it could be a chocolately dough! But that wouldn't get us the wonderful Whoopie Pies, would it? :)


Using a small ice cream scoop or two teaspoons, drop the dough onto a parchment lined cookie sheet and bake!


 (n.b. My small cookie scoop broke, so I used my regular ice cream scoop. This is why my final product is HUGE. I can't say don't do it, but it you want more than 8 final sandwiches, make them smaller than I did!)

It was right around this time that I realized I had enough batter to make 4 more cookies, so I went searching for my other cookie sheet. 3 cupboards and I then remembered where it was.


So I used a pizza pan instead!

The final product smelled and looked so good!

So while these were cooling on the racks -- you can take them immediately from the cookie sheet to the rack once they're out of the oven -- I got together my filling ingredients:


All of this went into the mixer bowl and made a beautifully delicious filling!


I spread (ok, I piped) the flat side of half the cookies with the filling and sandwiched them together for a really awesome treat!


The rest, of course went straight to the freezer. 


Happy Baking!!

Crystal 

-----------------------------------------------------------------

Whoopie Pies

For the cake:
5 tablespoons of cocoa
2 cups of flour
1 tsp baking soda
1 tsp baking powder
1 tsp salt
1/2 cup of Crisco shortening
1 cup of sugar
1 cup of milk
1 tsp vanilla extract

Preheat the oven to 375F. Line a large cookie sheet or jelly roll pan with parchment paper.

1. Sift together the dry ingredients in a bowl and set aside. In a mixer bowl, cream together the shortening and sugar. 
2. In alternating additions, beginning and ending with the dry mixture, add the milk & vanilla and dry ingredients to the shortening and sugar. 
3. Using either a small cookie scoop or two teaspoons, drop the batter in equal amounts 1 inch apart on the parchment-lined pan. 
4. Bake for 7-10 minutes (13 if you use a full sized scoop) or until the cookies are set. 
5. Remove the cookies to a wire rack (flat side down) to cool. 

For the Filling: 
1/2 cup of Crisco shortening
2 cups of confectioners (icing) sugar
2 egg whites (since these are not being cooked, I used pasteurized egg whites from a carton, but it's up to you!)
A dash of salt
2 tablespoons of marshmallow creme or fluff

Combine all the ingredients in a mixer bowl and beat until smooth. 

Spread the filling mixture on the flat side of half of the cookies and sandwich together. Store in a container with a tight lid or in the fridge/freezer. 

Enjoy!


Saturday, January 28, 2012

A Love Story...

My husband loves...very few things openly: me, our dog, firearms, computers and German chocolate cake. The last of these is a bond so strong that when I offered to make him a really kickass, gun-inspired cake for his recent 30th birthday, he responded by saying that he'd really rather have the German chocolate cake that they make at the grocery store.

Low, man, really low.

And so, I begrudgingly complied with his request (after all, it was his birthday) and as I sat there poking around at the light brown, coconut and pecan filling, I couldn't help but wonder what all the hype was about. DH doesn't seem to be able to pinpoint the exact cause of his obsession, but since the day we met, I've known that, when in doubt, this is the cake to roll with as far as he's concerned. He also has a habit of mentioning that he only gets it once a year, for his birthday (totally not true!) so I'm putting my coconuts on the table and making him the biggest and best post-birthday German chocolate cake ever!

I've missed typing this: First, we start with some ingredients!


First, grease and flour your pans. For this cake, you've got options. It'll make +/- 8 cups of batter. You could use 3 9-inch pans if you've got them. In my case, I went with a 10-inch round pan (yes, my cake is HUGE. I had no complaints!)

Next, prep your first two mixes:

First is the chocolate. I know this is called a German chocolate cake, but when you live in a small town with limited access to finer baking goods, you sort of have to go with what works. I took the sweetest chocolate chips I could get (milk) and it worked out fine. Along with 1/2 cups of water, melt 4 oz of chocolate in a small bowl.


It won't take long if you do it in the microwave -- around 20 seconds will do the trick! Stir until everything is smooth and set it aside to cool.

Second is the cake flour, baking soda and salt. Sift these together and set them aside.


Now it's onto the fun part!

In your mixer bowl, cream together the sugar and butter until everything is light and fluffy.


Beat in 4 egg yolks, one at a time until everything is well-incorporated, then add the chocolate/water mixture and vanilla.


Once that's all mixed, start mixing the flour mixture and buttermilk in, adding each in thirds and mixing until everything is just mixed.


In a metal (or glass) bowl, beat the egg whites until stiff peaks form.

Yep, that's my reflection in the top of the bowl!!
Fold a third of the egg whites into your cake batter. Then mix in the rest, being careful not to overdo it!


Put your pan(s) into the oven and bake! If you're going with the 3 9-inch pans, 30 minutes or so will be perfect. As I mentioned, I used a 10x3 round pan and it took well over an hour to bake. The toothpick never lies, however, so when it comes out clean, your cake is done!

The filling comes next. 

In a medium sauce pan, add the sugar, evaporated milk, butter and egg yolks (save the extra whites for a yummy omelette tomorrow morning!)


Cook over low heat, stirring constantly (I mean it!) until the mixture starts to get thick. 


I generally judge it by how long I can see the bottom of the pan between passes with the spoon. Once the mixture starts to hold for a second before covering the spot, it's right on. Remove the pot from the heat and add the coconut, pecans and vanilla. 


Stir well and set it aside to cool. 

Once the cake and filling are cooled (the filling will thicken up, don't worry!) spread the filling in between the cake layers (I cut my 10 inch cake in half and filled it) 


Now, traditionally, these cakes don't get frosted. Instead, you'd mix 4 oz of semi-sweet chocolate with 2 tsp of shortening and drizzle it over the cake. However, Mr. LMC whined that he wanted a frosted cake, and a frosted cake he got! I hope he's hungry!!


Happy Baking!! 

Crystal 

------------------------------------------------------------------------------


German Chocolate Cake

Ingredients

(Cake)
½ cup of water
4 oz of German (or milk) chocolate
1 cup of butter, softened
2 cups of sugar
4 egg yolks
1 tsp vanilla extract
1 cup of buttermilk
2 ½ cups of cake flour
1 tsp baking soda
½ tsp salt
4 egg whites

(Filling) 
1 cup sugar
1 cup evaporated milk
½ cup butter
3 egg yolks (beaten)
1 ½ cups flaked coconut
1 cup of pecans (chopped)
1 tsp vanilla extract

(Glaze)
2 tsp shortening
4 oz chocolate

1. Preheat the oven to 350 F (325 F if you’re using a 10x3 pan) Grease and flour 3 9-inch cake pans.

2. In a small bowl, heat the water and chocolate until the chocolate is melted. Stir until smooth and set aside to cool

3. In a bowl, sift together the flour, baking soda and salt.

4. In your mixer bowl, cream the butter and sugar until light and fluffy. Beat in the egg yolks, one at a time until everything is well incorporated. Blend in the chocolate mixture from step 2 and add the vanilla extract.

5. Alternating in thirds, beat in the flour mixture and buttermilk until everything is just mixed -- do not over mix!

6. In a large metal or glass bowl, beat the egg whites until stiff peaks form. Fold a third of this mixture into your cake batter, then fold in the rest -- again, don’t over mix!

7. Bake for approximately 30 minutes, or until a toothpick inserted in the centre of the cake comes out clean!

8. For the filling, combine the sugar, evaporated milk, butter and egg yolks. Cook over low heat, stirring constantly until the mixture has thickened. Remove from heat and stir in the vanilla extract, coconut and pecans. Set aside and let the mixture cool and thicken.

9. Spread the filling between the cake layers and on top of the cake.

10. Melt the shortening and chocolate in a small bowl, stirring until smooth. Drizzle over the top of the cake and enjoy!


Tuesday, October 18, 2011

The Perfect Frosting

We've all heard of... the "I'm Not a Frosting" person...they lurk in the offices, at the parties, or stop by the bake sale table. And I really can't say that I blame them, having had my share of super-sweet frosting with a strong confectioner's sugar overtone which is enough to make one scrape the excess off with a knife.

This frosting, however, is different.

Firstly, there isn't a trace of confectioner's sugar in the mix. Crazy, right? One cup of good ole granulated sugar completes this sweet topping.There's also flour, which is plenty common in the cake, but rarely seen in the frosting. Now that I've got your mouth watering, let's get on with the recipe!

As always, we begin with the ingredients:


The first step should be done well in advance as it will require some cooling time.

The flour and milk go into a small saucepan:


Get this all whisked together and put it over medium heat.


Whisk continuously and be sure to NOT walk away from this mixture, not even for a few seconds. It will thicken incredibly fast once it starts and even just a few seconds could make or break it. The end consistency should be around the texture of pudding.


Once it reaches pudding stage, remove it from heat and continue whisking it until it's all smooth.

Put this mixture aside until it's completely cooled. You can even transfer it to a dish and put it in the fridge. Even if it's cold, it's fine. Just as long as there's no trace of "hot" left!

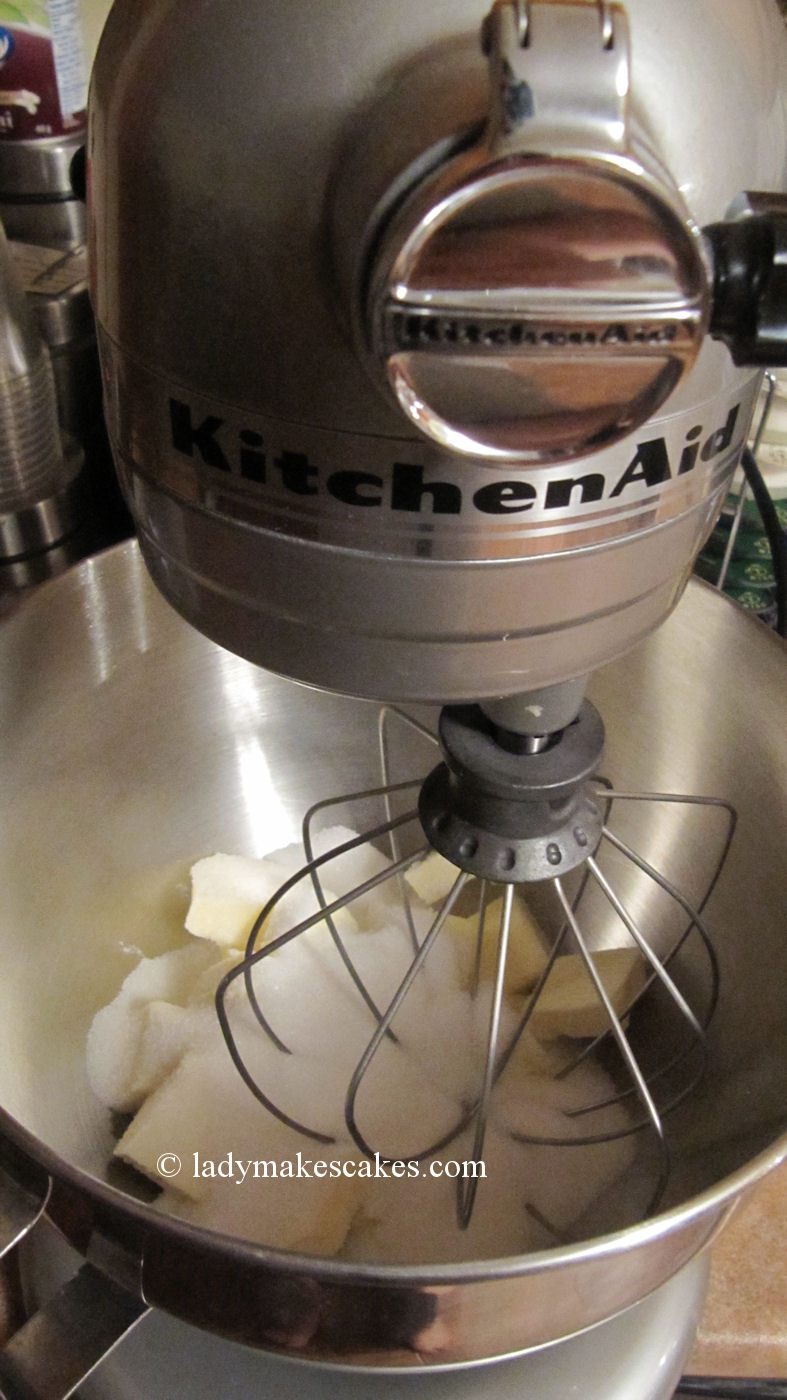
Once you're ready to continue, get your butter and sugar into the mixer bowl and add the whisk attachment.


Mix for a few minutes until everything is fluffy.


Add the vanilla and the cooled flour/milk mixture.


Now, here's the critical part: put the mixer as high as you can without anything going flying out of the bowl. It will take nearly 8-9 minutes of high speed mixing before the frosting starts to look like frosting. Around the halfway point, you'll stop the mixer to scrape down the sides and wonder just what the crazy cake lady has gotten you into, when you see the slightly separated mixture. Don't fret. Keep Mixing!

At 5 minutes:
 At 10 minutes: (I added orange colouring since I'm going to use this on Halloween cupcakes tomorrow night!)


The final result for your time and patience is a wonderfully smooth and silky, light and sweet frosting. It is the perfect texture for piping a 1M swirl or icing that layered cake.

If you make it the night before (like I did) you'll want to seal it in an airtight container and keep it at room temperature. In the fridge, it tends to separate. But it keeps nicely in a container on the counter until you're ready to use it!!

Enjoy! :)

------------------------------------------------------

The Perfect Frosting

6 tablespoons of flour
1 cup of whole milk (1% or 2% work fine too :)
1 cup of butter at room temperature
1 cup of granulated sugar
2 tsp of vanilla (or your choice) extract

Whisk together the flour and milk in a small saucepan over medium heat. Whisk continuously until the mixture starts to thicken. It will thicken very quickly once it starts, so when it begins to look like pudding, remove it from the heat and whisk until it's smooth. Set it aside to cool completely. If it's not completely cooled, it will melt the butter in your final mixture and you'll end up with a runny final product.

Once the mixture is cooled, whisk together the butter and sugar in the mixer until it's fluffy. Then add the cooled flour and milk mixture and extract. Whisk at the highest speed you're comfortable with (around a 6-8 on my Kitchenaid mixer) for 8-10 minutes, scraping the bowl occasionally, until the mixture becomes light and fluffy.

This will make enough for a whole 8 inch cake or 24 cupcakes!

Monday, October 3, 2011

The Equipment Post

From time to time...I get a question from one of my fabulous followers asking about the products I use and the equipment I can't live without (ok, they don't quite word it like that, but I like to gush, so...) In order to limit the rambling, I've compiled a sort of Top Ten list of the products that make the LMC kitchen what it is! 

So I present to you, in no particular order (except for number 1):

The Equipment of LMC

10. Cookie Scoops! Okay, so they're technically just oddly-sized ice cream scoops, but these are a total lifesaver! The smallest ones are perfect for portioning cake pop mix, the medium are great for cookies, and the regular sized ones are the exact amount of batter needed to make that perfect little cupcake! To put it in perspective, at this exact moment, there isn't a single container of ice cream in the LMC household, yet there are no less than 6 scoops in the big kitchen drawer. 

Check 'em out: Cookie Scoops


9. Parchment Paper! Seriously, this stuff is a God-send! I mean, how else can you explain something so simple that prevents food from sticking to your brand new Wilton cookie sheet? :) Mr. LMC likes the individual sheets for this exact reason. Just toss the paper when you're done and marvel at the clean surface beneath. The LMC favourite is the pre-cut individual sheets. 


Check 'em out: Parchment Paper Sheets


8. Decorating Squeeze Bottles! I used to look at these in the store and think that people must be nuts to pay money for a little plastic squeeze bottle. I was very humbly proven wrong the first time I drizzled a little chocolate onto my nice new cake pops. Whether decorating pops, filling a chocolate mold, or just making some easy details on that birthday cake, these bottles are simply one of the handiest little tools you could ask for!


Check 'em out: Wilton Squeeze Bottles


7. Disposable Decorating Bags! I am particularly fond of these on the days when I need to do a quick detail and am too lazy to get out the couplers out. Just snip off the end and drop in a decorating tip and voila! And as I am a fan of simplicity, these cater to my simple goal of easy and accessible cake decorating :) 


Check 'em out: Disposable Decorating Bags


6. Gel Food Colouring! I once had a reader send me an email lamenting that no matter how much liquid colour she put in her fondant, she couldn't get the colour nor the texture of the fondant in my tutorial. Extra liquid in, well, any aspect of baking is bad. It is especially bad when making fondant or icing. Gel food colouring gives you a rich and real color without messing with the composition of your recipe. The darker colours should be used in moderation, as they do tend to have a bit of a taste to them, however Wilton does make a "No-Taste" version of their red colouring...perfect for the upcoming holiday season!


Check 'em out: Gel Food Colouring


5. Cookie Cutters! I'll admit, I have a slight obsession with cookie cutters. Drawers, cupboards and baskets in my kitchen all contain, at least, a few cutters each in different sizes and shapes. On several occasions, I've returned home with a newly purchased metal shape only to find out that it's a duplicate. Oh well, there's strength in numbers, right? Whether making cookies (obvious) or creating fondant cut outs for my next cake, I couldn't do without my cookie cutters :)


Check 'em out: Cookie Cutters

4.  Fondant Smoother! You know, I have to say that I didn't like this tool a whole lot when I first received it as a gift. But the most I used it, the more I liked it. This handy little tool holds the promise of a flawlessly smooth surface on your fondant and is super useful when working on the edges. And as I learned through trial and error, don't press too hard or else you'll be cleaning icing up from underneath the fondant when it squishes out the bottom! 


Check 'em out: Fondant Smoother

3. Silicone Spatulas! I love my single silicone spatula so much that over the past weekend I reminded Mr. LMC that a few more would be a really nice Christmas gift since it seems like I'm always pulling the one I have from the sink or dishwasher and hand washing it so I can use it again immediately. There's nothing particularly genius about these, I just really love them and their ability to get that last little bit of batter from the bottom of my mixer bowl :) 

Check 'em out: Silicone Spatulas

2. Silpat Silicone Mats! It was a very long time before I finally dished out the dough (ha!) and bought my first Silpat Silicone Mat. I mean, afterall, how much different was this than parchment paper? Well, I was pleasantly surprised when I pulled my first batch of cake pops out of the deep freeze at an awkward angle and saw that nothing slipped. Thinking they were probably frozen to the Silpat's tacky surface, I took them off with ease and a sigh of relief. This hard working little mat was soon joined by his differently-sized friends and they've been in the deep freeze, freezer, fridge and oven without so much as a minor complication. In fact, the next major purchase on the LMC list is a larger Silpat for my cookie sheet. 

Check 'em out: Silpat Silicone Mats 


1. My Kitchen Aid Mixer! I love this appliance so much because for many, many years of my life, I believed that to acquire "Martha" status, one would require a Kitchen Aid mixer. I patiently awaited the day when one would unsuspectingly fall into my budget range and when that day happened, it was less than 6 hours and my new mixer came home with me. At first glance, she was christened with the name Louise, then I remembered that I owed this purchase to The Martha and so Martha-Louise was welcomed home. And every good thing you've heard about these mixers is true :) The power and design of this mixer makes every cake and batch of cupcakes just that much easier!


Check 'em out: Kitchenaid Professional Mixer


Happy Baking! 

Crystal

Sunday, July 31, 2011

Cupcakes Fit for Queen

So as it would seem...my mind works in a weird and wonderful way and from the moment I decided that this weekend's project would be a batch of delicious Black Bottomed Cupcakes, I've been humming along to Queen's "Fat Bottomed Girls." And as a friend so nicely pointed out, enough of the first, and you'll definitely get the second! Thankfully, I don't eat much of what I make...or else I may just have a British rock song in my honour. 

Black bottomed cupcakes are, essentially, chocolate cupcakes with a cheesecake centre. In other words: heaven. There are many, many variations of this recipe, some even start with a boxed mix. This recipe actually uses a very cool chocolate cake recipe with very few ingredients (as far as cake goes.) 

So we begin with the ingredients: 


In a mixer bowl, combine the filling ingredients: cream cheese, sugar, 1 egg and salt. 


Beat until everything is nice and fluffy, then stir in the chocolate chips. 


In a separate bowl (doesn't have to be a mixer bowl, this part can be done by hand) mix together: flour, sugar, cocoa, baking soda, and salt. 


Make a well in the middle and add the liquids: water, oil, vinegar and vanilla. Stir until well combined. 


Now, I know what you're thinking: a cake mix with no eggs?! It's true. I figured for all the richness of the filling, I'd use Crazy Cake for the base. There are many theories on Crazy Cake, but it seems to have originated during the Depression when kitchen staples like eggs and milk were hard to come by. I promise, even without eggs, this cake is awesome. 


Fill your muffin tins about 2/3 full. 


Then add a dollop of the cream cheese mixture to the top of each. (A cookie scoop works perfectly!) 


Bake them up at 350 for about 20 minutes (make sure you're using your toothpick tester in the outer edge of the cupcake, not the centre!) and enjoy the goodness!


In the first hour after the cupcakes cool, they're deliciously moist and gooey. Longer than that and they start to resemble a nicely set cheesecake in the middle. If you want a day old gooey cupcake, 10 seconds in the microwave will do the trick!


---------------------------------------------------


Black Bottomed Cupcakes

Filling:
1 package of cream cheese, softened
1 egg at room temperature
⅓ cup of white sugar
⅛ teaspoon of salt
1 cup of miniature chocolate chips

Cake:
1 ½ cups of all purpose flour
1 cup of white sugar
¼ cup of unsweetened cocoa
1 teaspoon of baking soda
½ teaspoon of salt
1 cup of water
⅓ cup of vegetable oil
1 tablespoon of vinegar
1 teaspoon of vanilla extract

Preheat the oven to 350F. Line your muffin tins with cupcake liners or spray with non-stick cooking spray.

In a mixer bowl, beat together the cream cheese, egg, ⅓ cup of sugar and ⅛ teaspoon of salt until light and fluffy. Stir in the chocolate chips and set the bowl aside.

In a separate bowl, mix together the flour, cup of sugar, cocoa, baking soda and salt. Make a well in the middle, then add the wet ingredients: water, oil, vinegar and vanilla extract. Stir together until well-blended.

Fill each of the muffin liners about ⅔ way full and top with a dollop of the cheesecake mixture.

Bake for 20 minutes or until a toothpick inserted into the cake part of your cupcake comes out clean.

Remove from pan after 5 minutes and cool completely on a rack. Enjoy!!