Friday, February 25, 2011

Wishing For Spring...

In honour of the snow storm going on outside this evening, I decided to make good work of the fondant from the previous tutorial and call upon spring for some inspiration. Despite my dislike of butterflies, I adore bumblebees. Perhaps the weather will see these cute little cupcakes and bring spring a little early. Perhaps? Or am I simply wishing?


Early this morning before leaving for work, I took the fondant out of the fridge to give it several hours to return to room temperature. After a bit of kneading, the first thing was to decide how many colors I'd be needing. Luckily, daisies are mostly white, so that saved me from having to color a chunk of fondant. My other two primary colors will be yellow and black (for the flower centers, and to make the bees.)


As I mentioned previously, there are two ways to color marshmallow fondant. The first is to color an entire batch when you melt the marshmallows, the second is to take a small ball of already-prepared fondant and color it by adding the color and kneading it. 


But first, the white needed to be rolled out and made into cute little daisies:


I cut out enough to make 9 double-layer daisies. I could also have done 18 single daisies, I just like the way the double ones pop off the cupcake. 


Next, I had to color some white fondant into yellow:


It doesn't look too pretty to start, but with a little work


and a lot of upper arm strength, I got it a nice bumblebee yellow:


Next, the black. I didn't take any pictures of the black fondant process because working with dark colors tend to result in your hands getting dyed the color you're working with..


Exhibit A:


So once I had all my colors and shapes figured out, it was time to make some cupcakes! A little purple dye gave them a nice, springy feel. A little tip is that if you don't have enough batter to fill all of your spaces in your pan, put a little bit of water in each of the empty cups so that they don't burn. 


While the cupcakes were cooking, I assembled my bees and flowers! I gave the petals a little depth by simply pressing down each one with the tips of my fingers. Then I doubled them up with a little bit of water in between to hold it all together. The bees are just yellow ovals with two black stripes and wings which are actually cut off daisy petals :) 


How cute are they?!


A little green icing on the top of each cupcake and the result was an adorable call out: Oh spring? Come out, come out wherever you are!!


Happy Baking!


Crystal 


Tuesday, February 22, 2011

Fun with Fondant

There's nothing prettier than a celebration cake covered in a smooth, colorful fondant. Once thought of as a difficult decorating technique saved for professional bakers and cakers, fondant has now become an easy, creative way to give your special cakes that final "wow" factor.

Marshmallow fondant is a sweet, easy-to-make version of it's more complicated brother that anyone can make at home. All it takes is some patience, lots of arm power and your imagination and you can make even the simplest cake spectacular.

Marshmallow Fondant

It all begins with a few basic ingredients:


You'll also need some: 


For the sake of this tutorial, I'll be making a ball of white fondant. However, you can add color to the white after it's completed. Alternately, if you're making an entire batch of the same color, you can add your color to the batch of marshmallows right at the beginning. 

First, we melt the marshmallows:


Put them in a microwaveable bowl and pop them in the microwave for 30-45 seconds to start until it looks like a big, sticky mess!


Don't microwave it too long, just until it's almost melted then stir, stir, stir until it become smooth (and still sticky!) 


Add a few cups of icing sugar:


and stir until it starts to form a dough.


Once it gets hard to stir, start to work the dough with your hands, much like you would with bread dough. You'll have to add another few cups of icing sugar. Eyeball it and remember that this dough can take a lot of sugar. 


Work the dough in the bowl until it becomes manageable. Once you can pick it up in a ball, sprinkle some icing sugar on your counter top and continue working the dough. Add icing sugar as needed, but be sure not to put too much or else your dough will get dry and crack. 


Keep working it until you get a slightly sticky, smooth ball of fondant:


If you're anything like me, the icing sugar will be everywhere by now...


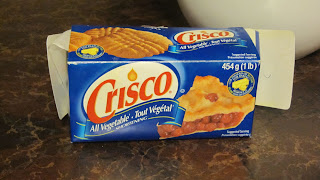
Once your fondant is all smoothed into a ball, get some Crisco and plastic wrap. 


Cover your hands in Crisco and, in turn, cover the ball of fondant. Then, double wrap it in plastic wrap and put it in the fridge until a few hours before you're ready to use it. Give it a couple of hours to come back to room temperature. Knead it a little and then it'll be ready to roll out and cover your cake!


Ingredients

Bag of miniature marshmallows
About 1/2 kg of icing sugar


Crisco 


Enjoy!!


Crystal


The National Police Wives Association

As Albert Camus put so simply and so perfectly: "Life is a sum of all your choices."

In July of 2007, I chose to go on a first date with a guy who was home on job training from the Atlantic Police Academy. What was at first a rather awkward encounter very quickly grew into love and into a partnership I knew would be a lifetime commitment.

In August of 2007, shortly before his graduation from the Academy and somewhat wary of the life that laid ahead of us, I chose to hit the internet in search of some resources and reassurance that the shift work, the inevitable over time, court, and most of all the changes I would see in my partner were something I could handle in the coming days, months and years.

What, or rather who, I found would change my life.

At the time, they were called Police Wives Online. And they were one of the greatest resources a person could ask for: real life experience. Women who'd "been there, done that" and could offer the exact reassurance I was looking for. Almost immediately, I felt like I'd made the kind of friends who'd be there if I ever needed them, could give insight into my life even before I'd lived through it, and, of course, be a whole lot of fun. For the girlfriend of a rookie police officer, they were invaluable.

Now known as the National Police Wives Association, and nearly 4 years later, I still find myself turning to the more experienced among us for advice, to whine about the aspects of police life (most recently: night shifts!!) and to gain valuable knowledge (e.g. always check the pockets for bullets BEFORE putting them in a washer!) These ladies have been here through our Academy graduation, our soon-after engagement, our wedding, buying our first house and I'm sure they'll be there for years to come, and life to come.

http://nationalpolicewivesassociation.org/

Be Safe and have a great day!

Crystal

Sunday, February 13, 2011

Chocolate Cheesecake!

This is my first attempt at a photo blog/recipe, so I'll ask that you bear with me as I found it to be a bit of a challenge to take pictures and make a cheesecake at the same time! I promise, it'll get better!

In honour of Valentine's Day, I'm starting out with an amazingly good chocolate cheesecake!

Valentine's Day Chocolate Cheesecake

It all starts with the basic cheesecake ingredients:


(a little later in my adventure, I realized I forgot to include the chocolate in the initial picture, so here it is, all chopped up in a bowl. There's 8 squares of semi-sweet chocolate.) 


1: Melt the butter and mix it with the cookie crumbs in a 9 inch springform pan. I find it easier to mix it in a little bowl before and then dump it in the pan. 


The back side of a measuring cup or flat-bottomed drinking glass is ideal for pressing the crumbs down to make the crust of your cheesecake. 


2: In a stand mixer, cream together the sugar, cream cheese and vanilla.


3: While all this is turning into this: 


take the aforementioned forgotten chocolate and melt it. Give it time to cool before mixing it in with your grand cheese/sugar/vanilla mixture. 


4: Add your eggs one by one, mixing until they're just blended, then pour the whole thing over your crust. 


5: Pop it in the oven for 45-50 minutes (until the middle is just about set) Once it's out of the oven, take a knife and run it around the edge to loosen the cake. Wait until it's completely cooled before removing the springform. Refrigerate for 4+ hours. Enjoy!!

I don't have a completed picture because as soon as it came out of the fridge, my husband was into it. But it turned out beautifully and the texture was very light and super chocolatey!

Ingredients

1 1/2 cups of chocolate cookie crumbs
2 tbsp butter (melted)

3 bricks of cream cheese
8 squares of Baker's Semi Sweet Chocolate (melted)
3/4 cups of sugar
1 tsp of vanilla extract
3 eggs

Oven @ 325F (if you're using a dark pan, lower it to 300F) 


Happy Baking!

Crystal 

Introduction

So...I suppose I should introduce myself seeing as how this is a brand new blog and it's been my experience that the best place to begin is at the beginning. 

I've been wanting to start a new blog for a while, debated on whether I'd have the time to adequately contribute to it, if I had the knowledge and know-how to mix some of my baking adventures into it and all the while keep it entertaining. I decided to try and if it all goes badly, oh well, I tried :) 


As you'll see in my handy little "about me" gadget, my name is Crystal, I'm 20-something and I live in the frozen tundra of Northern Canada (I'm only half kidding about the tundra thing...) I live with a flurry of furry fiends and a husband who occasionally ventures into the kitchen when I'm baking -- although he is mostly banned to the outer part of the island where he won't get in the way of the madness. 

As I'm typing this, my first "project" is in the oven, all ready for Valentine's Day! I've managed to document and put together a chocolate cheesecake that is so massive, it'll be shared by 4 different groups of people (us, the parents, the grandparents and the co-workers) all of whom are familiar with my creations and have no problems being guinea pigs! :) 


So please subscribe and I'll do my best to keep you entertained. Until then, happy baking!!